
Hi there,
Today I came up with a birthday card using MFT stamps and foiling for the sentiments. I had so much fun in using these glittery foils, I got long back in 2012 for my nail art obsession. I'm feeling nostalgic thinking about the good old days.

Tutorial:

Supplies Used:

Sharing this card into
simonsaysstampblog work-it-wednesday-june-2019-foil-it
simon-says- Wednesday challenge stars-and-or-stripes
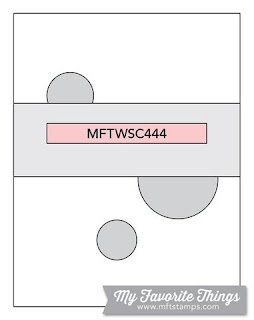
MFT SKETCHCHALLENGE
Simonsaysstamp mondaychallenge
Wordartwednesday anything-goes-394-395
Thanks for visiting my page and have a good day!
Today I came up with a birthday card using MFT stamps and foiling for the sentiments. I had so much fun in using these glittery foils, I got long back in 2012 for my nail art obsession. I'm feeling nostalgic thinking about the good old days.

Tutorial:
- Stamp all the images from MFT BB Birthday Chick stamp set onto a Bristol smooth cardstock.
- Color them using copics and fussy cut it.
- Cut a rectangle shape from a yellow cardstock and create a stripes pattern using LDRS Creative playful pattern Stencil along with Fossilized Amber Distress ink.
- Die cut the birthday wishes sentiment from Spellbinder using foils(Stick the foil paper onto the sizzix adhesive sheet and die cut them) and paste it over the yellow cardstock
- Place the above created pattern onto a black cardstock. Draw some stars on the black cardstock using white gel pen.
- Arrange the chick images onto the cardstock using foam tape and complete the card.

Supplies Used:
- MFT BB Birthday Chick stamp
- Spellbinder Birthday Wishes sentiment
- LDRS Creative Playful pattern
- Fossilized Amber Distress Ink
- Foils
- Sizzix adhesive sheet
- Paper studio color cardstock
- Strathmore Bristol Smooth cardstock
- Copics
- Uniball Signo white gel pen
- Copics
- 3M Foam tape

Sharing this card into
simonsaysstampblog work-it-wednesday-june-2019-foil-it
simon-says- Wednesday challenge stars-and-or-stripes
MFT SKETCHCHALLENGE

Simonsaysstamp mondaychallenge
Wordartwednesday anything-goes-394-395
Thanks for visiting my page and have a good day!


