Showing posts with label acrylic paint. Show all posts

Sunday, 11 August 2019

Ganapati Painting!

Hello friends,
Today I'm going to share Ganesha painting. This painting is simple and easy to recreate with acrylic or any other medium.
Tutorial:
  • Draw a rough diagram of ganesha face with pencil.
  • For making this background, use masking tape and paint them with acrylic paint.
  • Atlast color the ganesha face with orange and white acrylic,follow the same process for the other features.
  • Complete the painting by drawing eyes and other details like tilak .

I have shared the video tutorial for the same. Subscribe to my Channel Artconquers for more videos
Materials Used:
Canvas Board
Acrylic Paint
Varnish
Pencil

Thanks for stopping by and have a great day !


Wednesday, 27 December 2017

Wall decor inspired by Chumbak

Everyone loves surprises and gifts. Gifting your loved one on their special occasion is the best thing in the world. And when it comes to the choice of gifts, handmade gifts are priceless and unique.

I wanted to gift my friend on her birthday, who loves to decorate her home with wall mounts and room decors. So gifting her a wall decor was already in my list and then I ended up in making this handmade design.

I made this wall decor inspired by Chumbak designs & Products. I used air dry clay which is available in all the shops.

Procedure:
  • Draw a rough sketch of owl or whatever design you want to make.
  • Place the air dry clay in a plastic cover and flatten them equally using a rolling pin
  • For making a feather,head,body,eyes and other parts, use knife to cut out the shape.
  • Allow the clay to dry 
  • Decorate the feathers with beautiful design.
  • Color them before or after fixing the owl using feviquick/quick fix.

I have shared the video for making this Wall decor in my YouTube Channel. Please subscribe to my YouTube channel"ArtConquers"


Materials Required
  • Air Dry clay
  • Glue
  • Acrylic paints

Thanks for visiting my page and keep following for further updates.

Thursday, 7 December 2017

How to make Glossy paper quilled earring and its Waterproofing method

This post is all about making the paper quilled earring as a glossy one and its Waterproofing method. I've tried a good number of paper quilled earrings in the recent past, but somehow it loses its colour and beauty in few days itself because of moisture, water, dirt and whatsoever.So, the simple and straight solution would be waterproofing them.


I've seen lot of websites selling glossy jhumkas which is absolutely waterproof and so glossy. I never know the secret of those long-glowing earrings until one of my friend shared the making technique with me. Hence, thought of sharing the same with you all too.

Making of Glossy Jhumkas/Waterproofing them

The Resin & hardener is available in all craft shop and online. I bought EasyCast Resin & Hardener online.The mixing of resin & hardener differs for every brand. Please check the direction of use. This resin & hardener mixture gives pungent odor and allergic to people, so be careful when mixing them, would strongly suggest to do it in a open space without fan. Please reach out of children. 


Mix the resin & hardener of equal parts in a plastic cup and mix them thoroughly without forming any bubbles. After 5 to 10 mins, apply the mixture onto the jhumkas with the help paint brush and allow it to dry for 24 hours.After drying, one can decorate the jhumkas of their own choice. I'm happy that these jhumkas gives glossy effect and waterproof.


Tip: For smooth finishing of jhumkas, one can use nail buffer or salt paper on the dome shaped surface before applying the resin.


Materials Required
  • Quilling paper 
  • Resin & hardener 
  • Plastic cup
  • Acrylic paints
  • Paint brush
  • Earring stud
  • Head pin
  • Stone chain
  • Glue

Items are brought from
  • Amazon.com(Resin & Hardener) which is quite expensive.
  • itsybitsy.in(Resin & Hardener)  where one can get it for less price
  • Tina Art & Craft ( Chennai,Tamilnadu)

Thanks for visiting my page.

Please subscribe to my YouTube Channel "ArtConquers"

Monday, 27 November 2017

Hot Air Balloon -- Quilling tutorial

Riding in hot air balloon is amazing and many of us dream to ride at least once in our life time. Watching the colorful hot air balloon flies in the sky is always fun.And I tried the same imagination of mine with this quilling art. 

I used Chevron shaped quilling paper for the center and honeycomb technique for the remaining sides. I cut the paper in shape of sky and colored the outline with light blue color pencil, stick round coil qulling paper at the backside of the sky to look like 3D effect


Materials Required:
  • Quilling paper
  • Quiiling needle
  • Glue
  • Paper
  • Acrylic paints
I have shared the video for making this Hot air balloon tutorial in my YouTube Channel. Please subscribe to my YouTube channel"ArtConquers"


Linking this to IQCG#42 - Chevrons


Thanks for visiting my page and keep following for further updates.

Monday, 26 June 2017

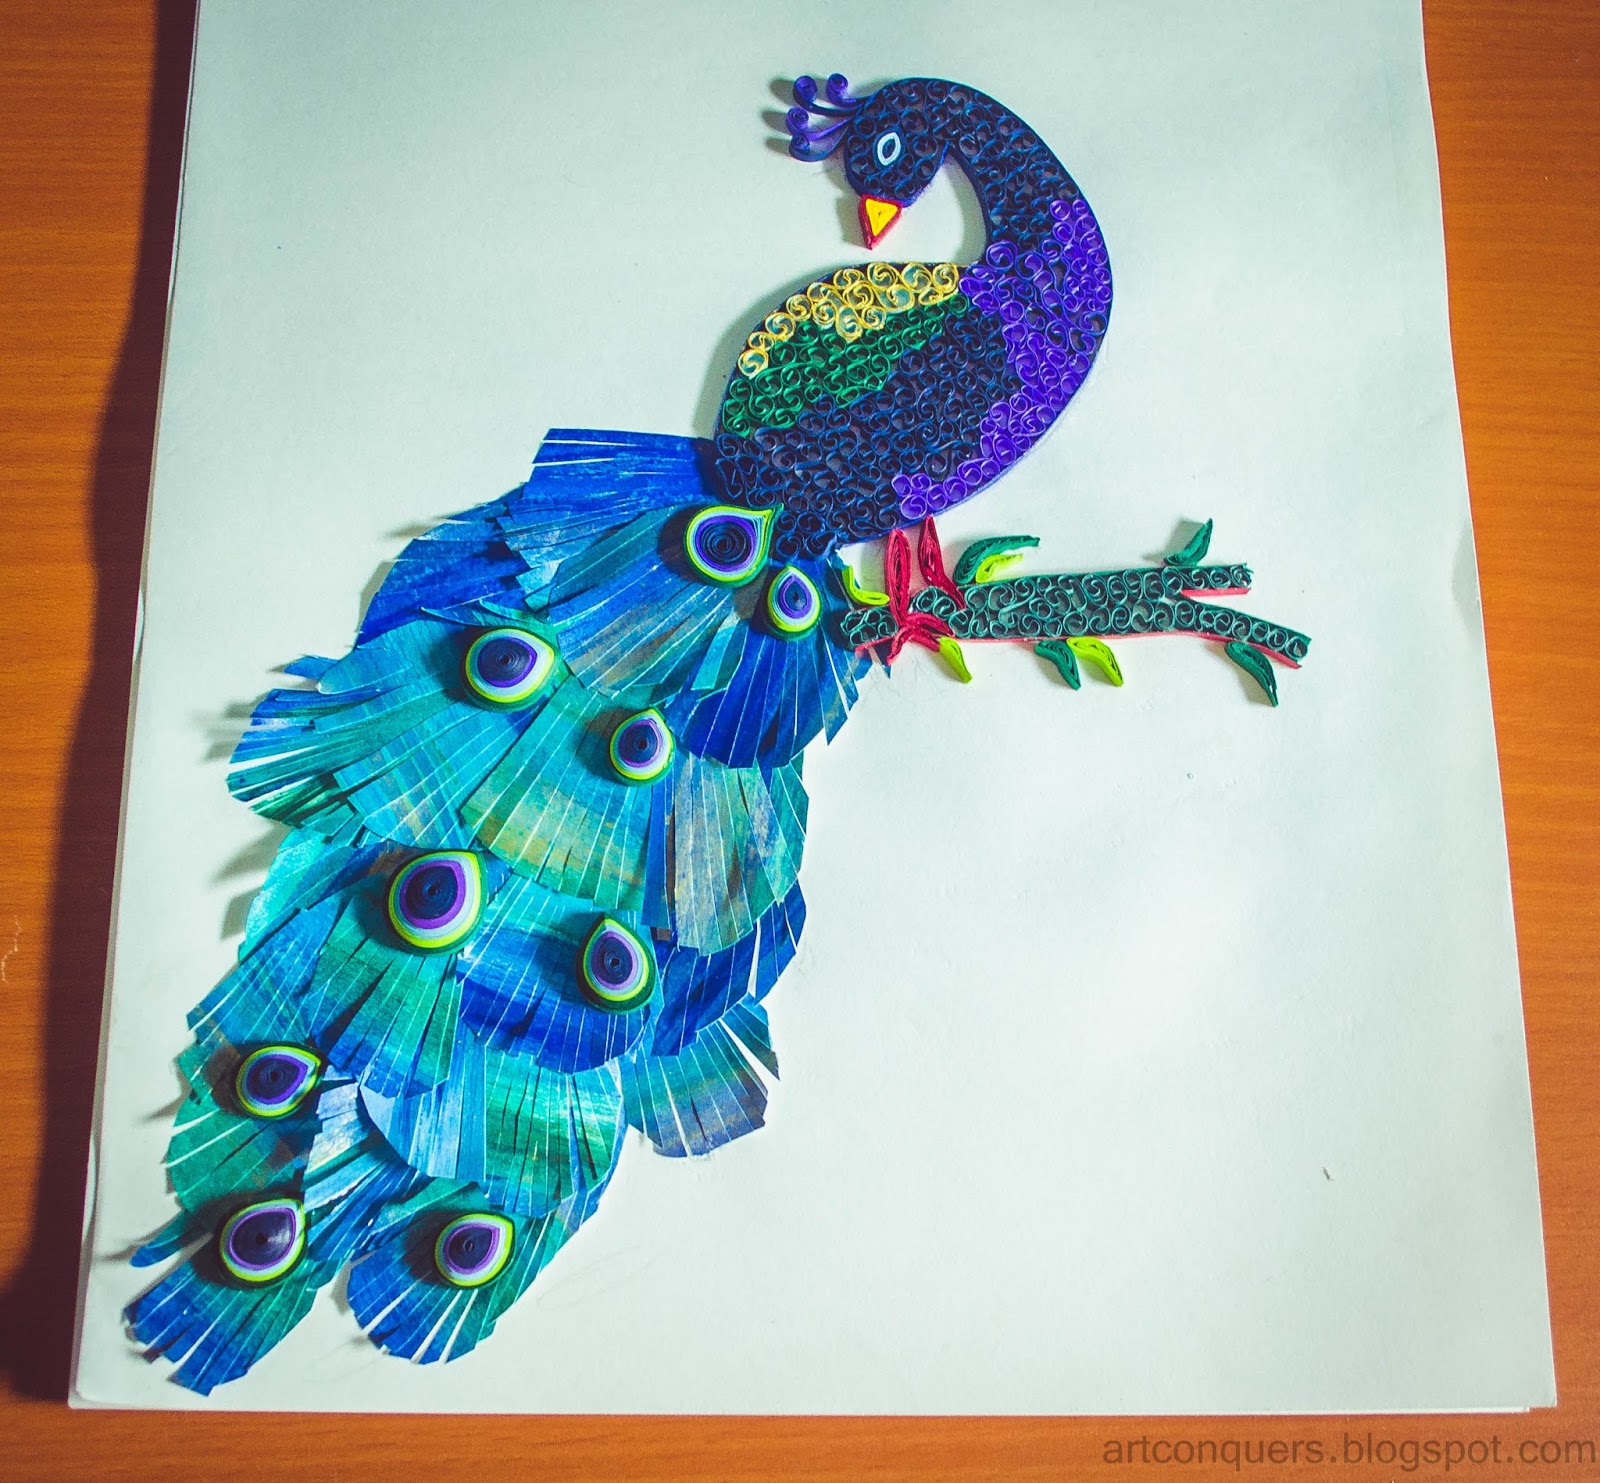
Quilling Art -- Peacock

Peacocks are large and colorful bird known for their feathers.The beauty of peacock is their colors, a wonderful combination of  blue and green. This time i tried making a peacock wall hanging by quilling.

I have used honey comb technique which is very easy and less time consuming. One can use their own technique for filling the peacock body.

Peacock - Full view

For peacock feathers, i used white paper and painted them with blue,green & golden color. Cut them into a shape of peacock feather.
Pecock feathers

For middle portion of the peacock, i used blue,violet,light blue,light green & green quilling paper and made a oval tight coil as shown in the picture.

Materials Required:
  • Quilling paper
  • Quiiling needle
  • Glue
  • Paper
  • Acrylic paints
I have shared the video for making this Peacock Tutorial in my YouTube Channel.Please subscribe to my YouTube channel"ArtConquers"


Linking this to  IQCG #37 - Blue with a splash

Peacock

Thanks for visiting my page and keep following for further updates.

Saturday, 25 June 2016

Terracotta Air Dry Clay: Paper Clay Vs Natural Clay

In ancient time, terracotta art were used for living. But now it became a fantasy and hobby.

I always wanted to make terracotta jewellery.Making terracotta jewellery is not that simple, it needs baking. I went through multiple sites and did research on how to bake the clay. I find it to be difficult. Then i came to know about air dry clay through one of my friend. 

There are different varieties of air dry clay and many brands too.

I just picked Natural clay and started doing a simple stud, i allowed it to dry for 24 hours, but the stud was too brittle and cracked here and there. So the next time i made a thick stud, but the end results were same as the previous one.


I wanted to try some some other clay and then i got "NARA Paper clay" and started my work. My first attempt of making the terracotta Jhumkha came good without any crack and it was kind of strong. But one disadvantage is that the outer surface is not smooth as i expected,though i was happy with the end results and painted my Jhumkha with acrylic.


Here are my collection of terracotta earrings.


So put your awesome imagination to start with terracotta jewellery making and do please let me know, the best air dry clay for making terracotta jewellery.

Thanks for visiting my page.

Saturday, 11 June 2016

Paper Quilled Earrings

This post is all about earrings made out of quilling paper. I made "jhumkas"(Indian traditional round shaped earring) on which i have painted some pattern with acrylic paint. I have used weaving basket and honey comb technique for the other earrings. 


To protect the earring from water, I used varnish as a top coat


I made simple roll out of quilling paper to make this stud. I painted the earring with blue color to match with my dress.


I made multiple earrings and painted some pattern on earring. One can make their own earring as per their dress combination.


I also made the earring made out of clay, still it takes time for drying, will post in the upcoming week.


Thanks for visiting my Page.

Please subscribe to my YouTube Channel "ArtConquers"